Search This Blog

Thursday, November 22, 2012

SHOP CIMILY IS OPEN!!!!

YES! THIS GLORIOUS DAY HAS COME!

http://shopcimily.com/

I'm so exuberantly excited. If you're new to my blog or my Youtube Channel, Shop Cimily is an online store for young women's clothing and accessories that I founded. 100% of Shop Cimily's earnings will be donated to the Tinkuy Peru Mountain School, located in Huancayo, Peru, where I volunteered at and taught English over this past summer. Right now I'm focusing on:

  • Buying the children Christmas gifts
  • Shipping over boxes of donated clothes
  • Buying a projector for the school
Hopefully, if Shop Cimily proves to be successful, we can look toward donating to other charities as well!


Like Shop Cimily's Facebook page: http://facebook.com/ShopCimily

Shop Cimily's Youtube Channel (where I will have monthly sneakpeaks and giveaways!): http://www.youtube.com/user/shopcimily

Shop Cimily's Launching video:


Happy Thanksgiving everyone!

Monday, September 24, 2012

Shop Cimily to open soon!!

As I mentioned in my last video, I am planning on opening up an online shop/ boutique, in which 100% of the proceeds will be donated toward funding and helping out the Tinkuy Peru Mountain School that I volunteered at this past summer (read about my adventures there on my personal blog). For now, the money will serve to cover the clothing donation shipment expenses and buy the school a projector and a few other electronic devices that will enable the start of a more advanced educational program. My hope is that the store will eventually grow big enough and be able to generate enough money to donate to other charities as well! ^___^ The website is currently under development, and photo shoots are taking place for the products.

The shop will offer a myriad of apparel and accessories primarily aimed at young women (AKA people like me). All of the items are hand-picked or hand-made by yours truly. Owning and managing my own online shop has always been one of my biggest dreams and aspirations, and being able to marry my fashionista side and my passion for volunteering abroad (basically, my only two interests) is a dream come true. A dream coming true, that is.

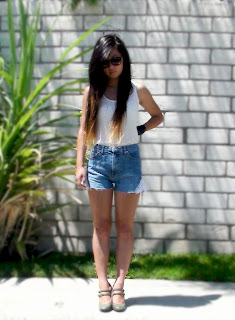
Here is a preview from last Saturday's photo shoot with the one and only Hannah P. (click here to visit Hannah's blog!)


I've started a separate blog for the store, so visit http://shopcimily.blogspot.com/ for future updates! :)

Saturday, September 1, 2012

Por fin

New video up: Swap Meet Haul
 

I am amazed

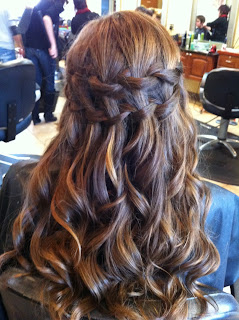
I stumbled upon the most amazing hair stylist/ make up artist ever. She does lots of wedding hair and makeup, and the pictures on her blog are gorgeous as well. I can only wish to ever be as good as she is. Check it out:

http://blog.hairandmakeupbysteph.com/

Some of my favorites (after stalking her blog for about an hour):


Thursday, August 30, 2012

Saturday, July 21, 2012

DIY Floral Headband

As Megan's early birthday gift, I made her a floral headband yesterday. She wanted one with spikes, but since I could not obtain them in the time given, I left them out. Here's how it turned out:


Materials:

  • Plain / unribboned headband
  • Ribbon or whatever material you wish to wrap around the headband. In here, I used a cream crocheted fabric
  • Small artificial flowers -- just buy a bouquet of them and then pluck them off.
  • Glue gun
  • Thin ribbon to use as a tying thing (facultative <-- new vocab word meaning optional)
  • Scissors
The process was pretty straightforward:
  1. Glue on one end of the ribbon/ fabric you want your headband to be wrapped in.
  2. Glue on the flowers. You can have them more sparse (like mine) or more bountiful.
  3. Glue on the thin ribbon to the inside of the headband. Make sure to leave enough at the ends to be able to comfortably tie around your head.
My eyebrows in the picture on the right look almost
as sparse as the number on flowers on the headband..


Going to Peru in 2 days; probably won't be blogging much here. See ya'll later!
-Cindy

Saturday, July 14, 2012

DIY Bow Back Shirt

Making your own bow back shirt is indubitably simple and takes only a few minutes. 

You will need:
  • A shirt
  • scissors
  • small pieces of lace or whatever you want to create your bow with
  • needle & thread. (you can opt for super glue instead!)


And there you go!

Yay for the continuation of my bow infatuation. (:

Sunday, July 1, 2012

DIY Leather Hair Bow

****************
The leather bow featured in this blog post is now for sale on Etsy.com!https://www.etsy.com/listing/103474884/black-genuine-leather-hair-bow-barretteI am trying to raise money to go to Peru later this month. I will be volunteering and teaching English at a local school in Huancayo for children who do not have the financial assets to attend school. I would really like to be able to pay my host family well and buy gifts for the children and donate. All profits will go directly to helping them. Thanks! 
****************

*Note that there are several ways to making a leather hair bow, but this is the way I went about doing it and it worked well for me! ^__^ Enjoy!

Materials needed: 
  • Strip of leather, size depends on how big you want your bow. I used a piece about 13" long and 3" wide.
  • Super glue* (this is not necessary, but I find that it holds the best. you can opt for some string instead.)
  • a barrette (mine is 3")
  • Needle & thread* (may be arbitrary)

10" by 3" piece of black leather. LOL my PSAT book in the background... 

Super glue

3" barrette
Step 1:

Cut the leather into desired shape & glue into a loop.


Step 2: Pinch from the middle into desired bow shape:


Step 3: Add a dot of super glue to the middle point and pinch into place:


Step 4: Take a small 1/2" wide piece of leather to wrap around the center & glue it down:


Step 5: glue the back onto the barrette:

Press firmly

Step 6: for extra security, use needle and thread to sew the barrette onto the bow using the side holes.


Wha-la! 'tis done!


I had also dip-dyed/bleached/ ombre-d my hair today, so if you wanna see that video, here it is: